Step-by-Step Guide: Setting Up a Webmail Account on iOS® and Android™

Setting up your cPanel or Plesk email on iOS and Android devices ensures you stay connected to your professional or personal email on the go. This guide will walk you through the steps to configure your cPanel or Plesk email on both platforms.

Prerequisites

Before you start, ensure you have the following:

  • Your cPanel or Plesk login credentials.
  • Your email account details (email address, password).
  • Incoming and outgoing server details (IMAP/POP and SMTP).
  • A stable internet connection.

Setting Up a cPanel or Plesk Email Account on iOS

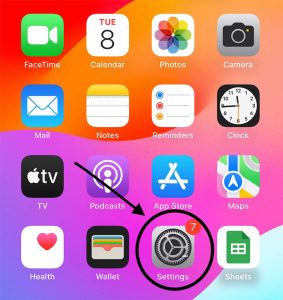
Step 1 – Click “Setting”

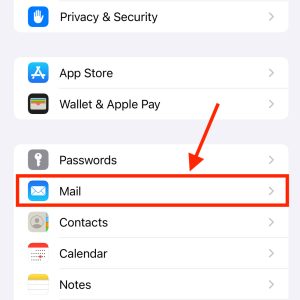
Step 2 – Select “Mail”

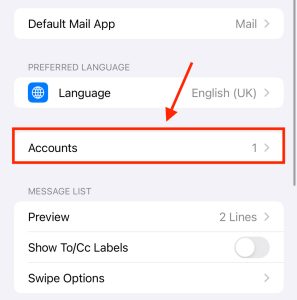
Step 3 – Select “Account”

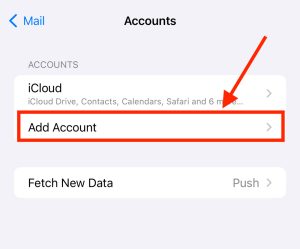
Step 4 – Select “Add Account”

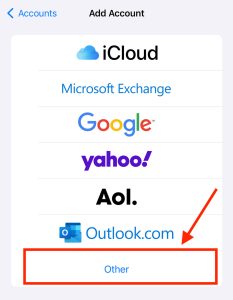
Step 5 – Select “Other”

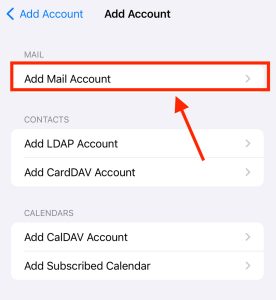
Step 6 – Select “Add Mail Account”

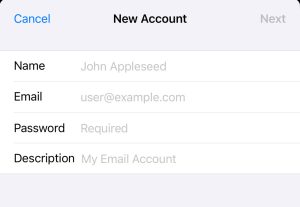
Step 7 – Start adding the details, then click “Next”

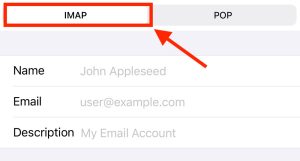
Step 8 – Make sure to select “IMAP”

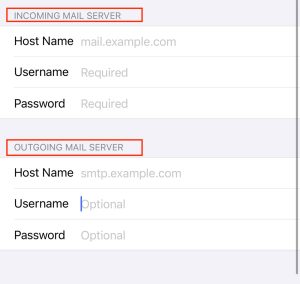
Step 9 – Fill in the “Incoming & Outgoing Mail Server” informations

The information filled in both sections is the same.

This will successfully set it up on your phone!

Setting Up a cPanel or Plesk Email Account on Android

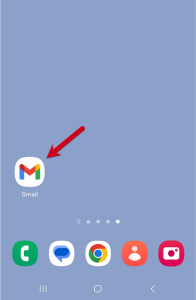
Step 1 – Click on “Gmail”

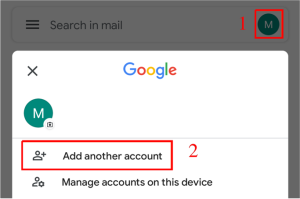
Step 2 –

  1. Click on your profile picture
  2. Click on “Add another account”

Step 3 – Select “Other”
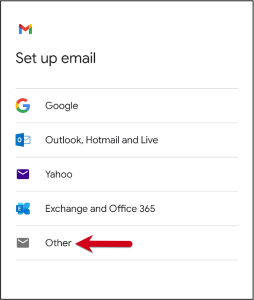
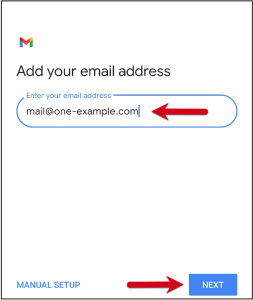
Step 4 – Enter your webmail, then click “Next”
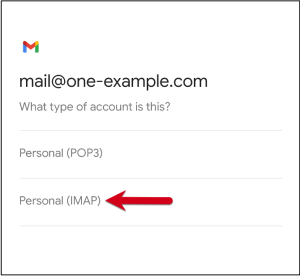
Step 5 – Select “Personal (IMAP)”
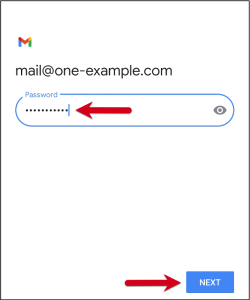
Step 6 – Enter webmail password, then click “Next”
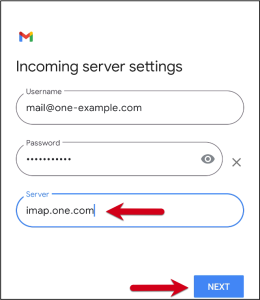
Step 7 – Add the Incoming Server details, then click “Next”
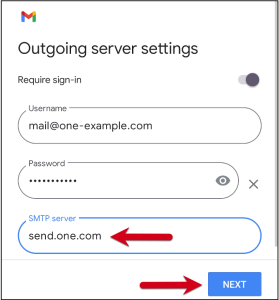
Step 8 – Add the Outgoing Server details, then click “Next”
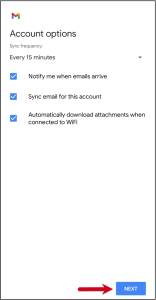
Step 9 – You can set the frequency for Gmail to check for new emails, when to receive notifications, and more. Uncheck any options you don’t need, then click “Next” to continue.

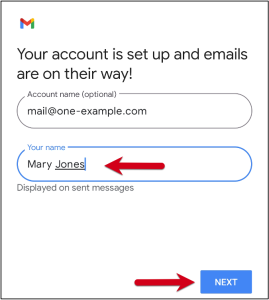
Step 10 – Your account is now set up and ready to use!

Leave a Reply

Your email address will not be published. Required fields are marked *